Pet portraits are a terrific way to showcase your dog grooming skills. Clients love seeing cute before and after shots of their dog once a visit to the groomer is complete. Intimidated by the thought of taking pictures that clients will see? Don’t worry, you don’t have to be a professional photographer to capture some great shots of your work! In this post, we’ll tell you exactly what you need to know!
It’s a given that you should invest in a good camera if you want to take beautiful photos. But make sure that you aren’t just spending all your time messing with the settings on your camera. Pets can be difficult to photograph, especially if you are relatively unfamiliar with them. If you want to take the best “before” and “after” shots to show off your grooming expertise, read on!
Before:
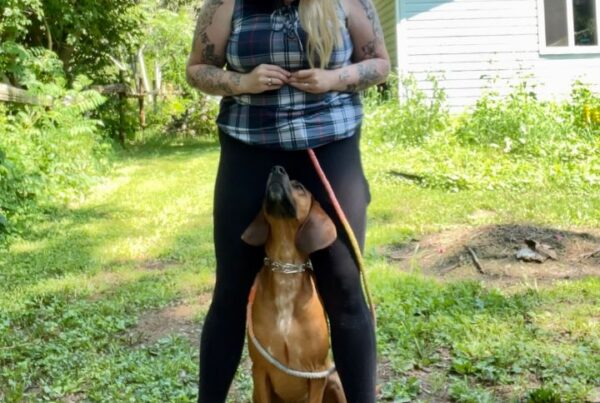
“Before” pictures do not have to be the prettiest, brightest, most dramatic photos you can possibly take. The main purpose of “before” shots is to document a pet’s appearance before you’ve had a chance to work your magic on it. So make sure you work your angles. Take photos from the front, sides, rear, and top angles to show off the complete look of the dog before you’ve groomed it. And remember, the same angles must be replicated in the after shots!
A huge difference in “before” and “after” photos is always impressive. But that doesn’t mean you should be manipulating your images for dramatic effect! Not only will your clients appreciate your honesty, but you’ll also benefit from accurate pictures of your work, too. Reviewing your work, especially in the early stages of your pet grooming career, can help you sharpen up your grooming skills.
After:
“After” photos are taken after all of the services have been completed. These photos will demonstrate your grooming prowess to potential clients. To show off the high quality of your work, make sure your photos are close and detailed. Remember that every angle that you have a “before” shot taken should have an “after” counterpart. Here are a few tips and tricks to help you take the best “after” photos:
Natural light
Not only does natural lighting make any subject (human or animal) glow, but the coloring of the photos will be more true-to-life. The texture and colors of the coat will stand out more than if you simply wipe out detail with an obstructive flash.
If you do decide to use flash, just be prepared for an awkward subject. Most dogs do not like the harsh glare of a flash! They may close their eyes or look away! And while it is possible to use flash, make sure that when you do, you do not aim the flash directly at a dog. Use an external speedlight with a diffuser as direct flash can startle and frighten even the most complacent of pets. Also, keep in mind that flash will often reflect off of a pet’s retina, resulting in everyone favorite looks: “red-eye” or glowing “laser eyes.”
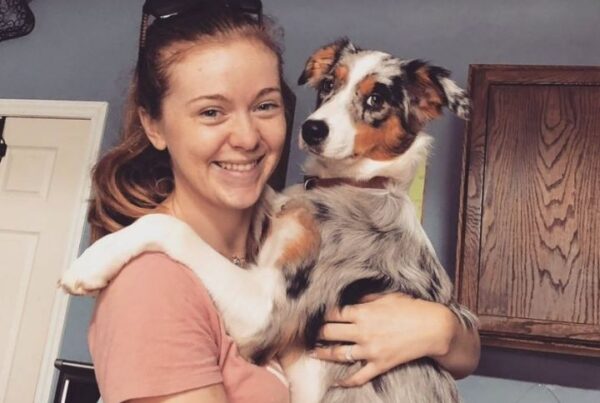
Focus on the pet’s eyes
What better feature to focus on than the eyes, the most expressive part of the face? Not only does it make for more interesting portraits, but showing off some happy canine clients will engage potential clients! Especially if a dog has just had painful matted knots removed during the grooming session, honing in on the eyes can show just how happy and relieved he is. Just make sure that the eyes are not the sole focus of the shot. You want to show off your grooming skills at the end of the day!
Keep it level
Don’t be afraid to get low on the ground to photograph the pets head on. People are used to seeing their pets from a birds-eye view, but you want to make sure that you get in all angles of a great groom job. You’ll also be able to capture your work in greater detail if you’re up close and personal. Just make sure that you stay a comfortable distance—a nervous or defensive pet will not be the most cooperative model!
Pet-owner presence
Having the pet owner in the studio with you can help a lot. The owners know their pets best and probably have their own tricks to keep the pet calm and relaxed during the session. It’s also handy for owners to bring in their dog’s favorite toy or treat—you may want to hold off actually using them if the pet tends to be overexcited around these items. Having the owner around will be able to help direct the pet’s attention to look at you so you can snap the perfect shot.
Your pet portraits should demonstrate your well-rounded grooming skills. Winter grooming can be tricky, so check out this post for a quick and easy guide to help you out!